

Build and deploy an app using the Next.js 13 app directory.

I am a developer from Uganda passionate about sharing my knowledge
Prerequisites:
First, make sure your development environment meets the following requirements:
Node.js 16.8 or later.
MacOS, Windows (including WSL), and Linux are supported.
Undertsanding of HTML, CSS, Js and React components
Basic Knowledge of how to deploy an app to production
Note: While the
pagesdirectory requires Node.jsv14or later, theappdirectory requires Nodev16.8.0or later.
Automatic Installation
To automatically create a new Next.js project using the app directory:
npx create-next-app@latest --experimental-app
create-next-app now ships with TypeScript by default. See TypeScript for more information.
Manual Installation
To create a new Next.js app, install the required packages:
npm install next@latest react@latest react-dom@latest eslint-config-next@latest
Open package.json and add the following scripts:
package.json
{
  "scripts": {
    "dev": "next dev",
    "build": "next build",
    "start": "next start",
    "lint": "next lint"
  }
}
These scripts refer to the different stages of developing an application:
dev: runsnext devto start Next.js in development mode.
build: runsnext buildto build the application for production usage.
start: runsnext startto start a Next.js production server.
lint: runsnext lintto set up Next.js' built-in ESLint configuration.
Next, opt into the beta app directory. Create a next.config.js file in the root directory of your project and add the following code:
next.config.js
/** @type {import('next').NextConfig} */
const nextConfig = {
  experimental: {
    appDir: true,
  },
};

module.exports = nextConfig;
Create an app folder and add a layout.js, page.js, and head.js files. These will be rendered when the user visits the root of your application.
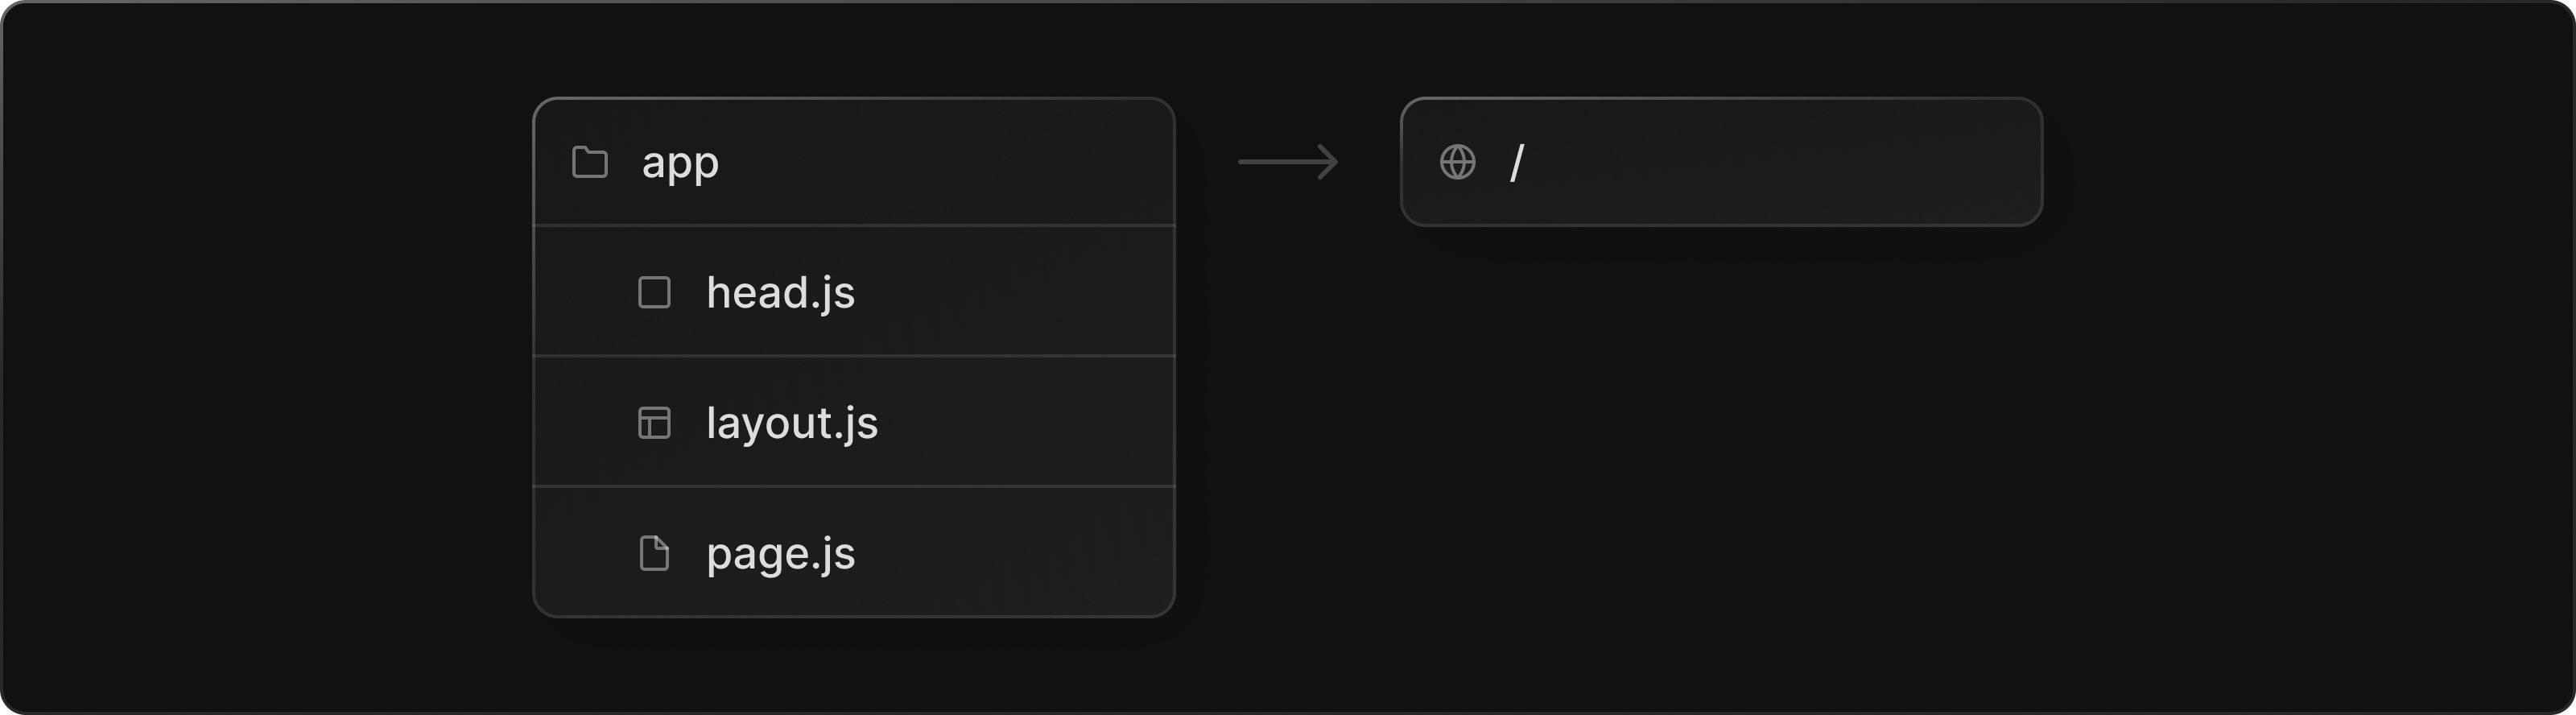
Create a head file app/head.js with a title and meta viewport tags to the file:
app/head.js
export default function Head() {
  return (
    <>
      <title></title>
      <meta name="viewport" content="width=device-width, initial-scale=1"  />
    </>
  );
}
Create a root layout app/layout.js with the required <html> and <body> tags:
app/layout.js
export default function RootLayout({ children }) {
  return (
    <html lang="en">
      <head />
      <body>{children}</body>
    </html>
  );
}
Finally, create a home page app/page.js with some initial content:
app/page.js
export default function Page() {
  return <h1>Hello, Next.js!</h1>;
}
Good to know: If you forget to create a
head.jsorlayout.js, Next.js will automatically create these for you when running the development server.
Running the Development Server
Run
npm run devto start the development server.Visit
http://localhost:3000to view your application.Make changes to
app/layout.jsorapp/page.jsand save the files where changes have been made to see the result in real-time on your browser.
Make a production build
Before pushing/deploying the project to the cloud, you shall have to run the command below
npm run build
After this command is completed successfully, you have a clean build that can be pushed to the cloud and made live.
Commit all the changes and push them to your version control system (I use Github)
Deploying to Vercel
Once you're done pushing changes to Github, we are going to go ahead and walk through the steps to deploy our app using Vercel.
Visit Vercel and create an account if you don't have one already. Vercel enables you to host your personal and test projects whose codebases are either on Github or GitLab for free.
Create an account on Vercel or continue with github as shown in the screenshot below. Choose any option you prefer to continue with.

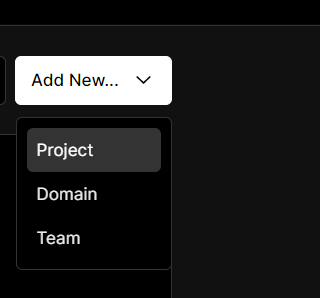
When you successfully log in; you are redirected to the Vercel Dashboard, look for the white button( Add New )

When the Add New button is clicked, the preview below is presented. You want to deploy a project so click on the item named project
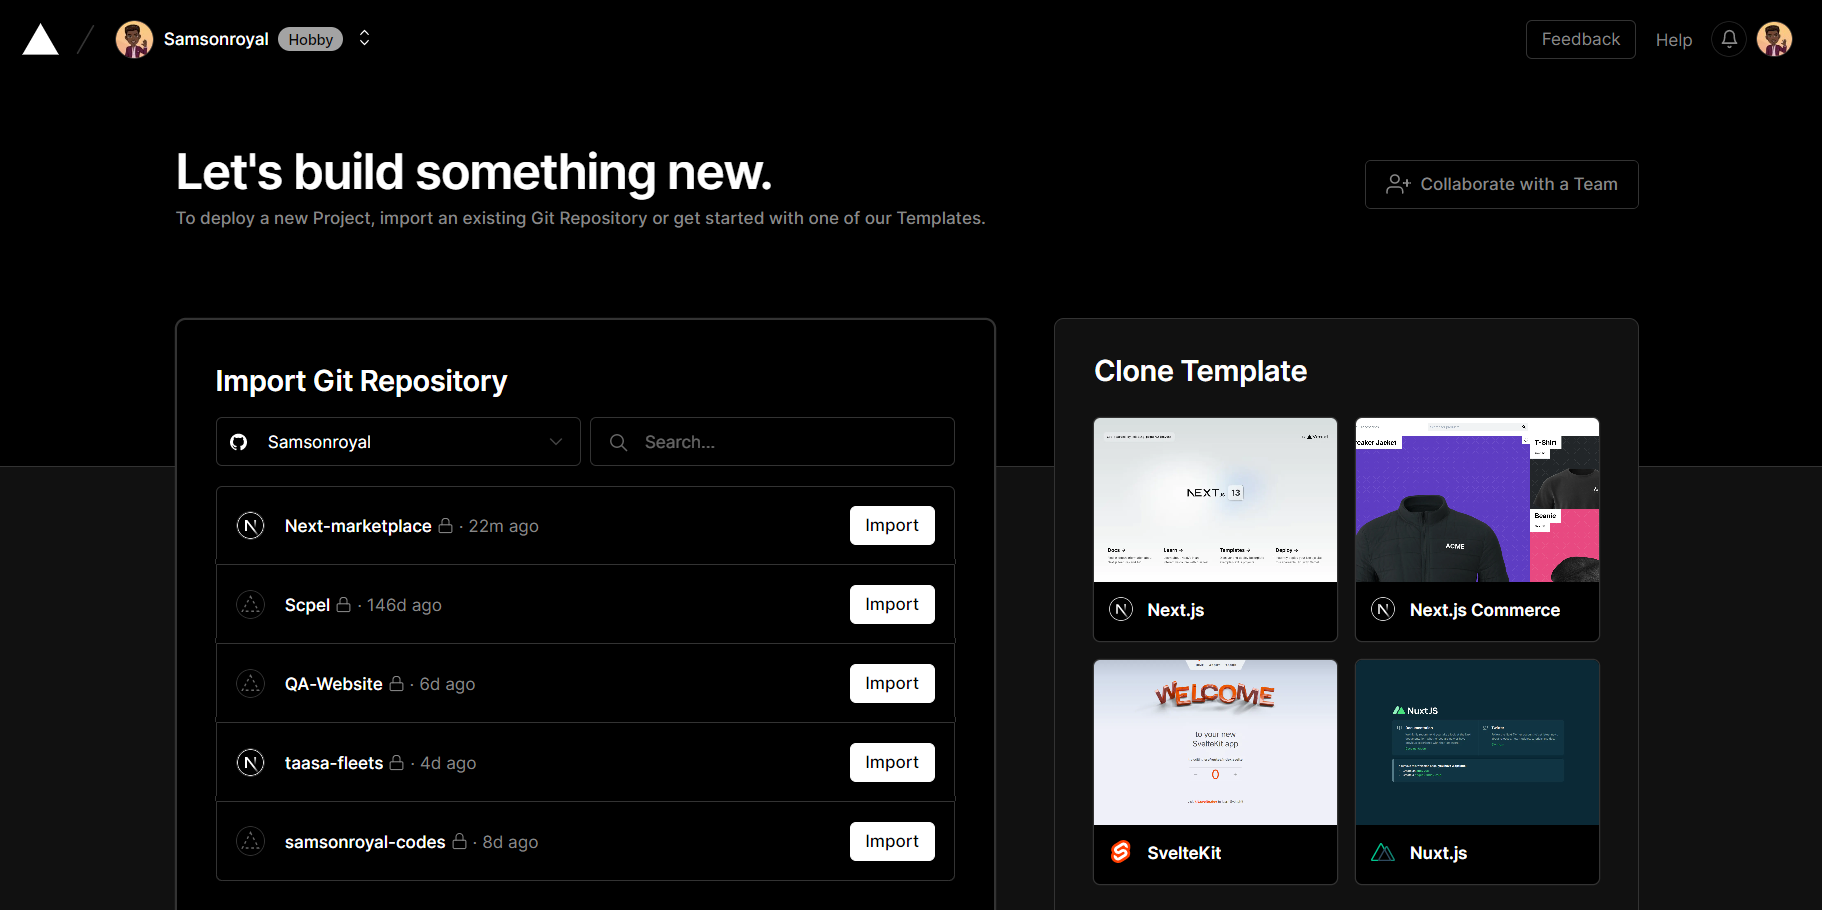
After you click on the project item, you are redirected to another screen that looks like this, You can use the search bar to type in the name of the repository on github and it'll appear, click on the import button
Once you click on import, you are redirected to a screen that looks like this, where you can choose the project name, and then finally click on the Deploy button. All the checks are run for you and thus you don't have to worry. In the instance that you are deploying an app that uses the Next.js framework, Vercel automatically recognizes it and sets up a development environment suitable.

Once it runs and deploys the app successfully, you'll receive some confetti 🎊 and call it a good deployment. Thanks for following through with this tutorial
Sharing my understanding of concepts and approaches to problem-solving gives me happiness and it also helps me further my career. If you have any questions, feel free to reach out!
Connect with me on Twitter, LinkedIn, and GitHub!
Also, reach out to me, if you love to discuss startup building and building open-source software directly through my email📧 .


