

How to embed a google maps feature in a Vue 3 app
Using Places API and Maps JavaScript API from Google maps platform


Table of contents
Introduction
With the upgrade from Vue 2 to Vue 3 if you want to build an app in Vue.js and be able to embed the google maps feature into your app; this is a tutorial you would want to follow.
Setup your dev environment and tools
Step1: Create a folder and name it anything you'd like to; I named my folder randomly "Googlemapstest"
Step2: Open the folder with Visual studio code which is my preferred code editor; ( or your choice of code editor)
Step 3: Open the terminal and run the command(s) below when the code editor opens successfully. This next section is aimed at helping you install or create a template project in Vue 3.
Create the project using a boilerplate
This command installs an npm package called Vue cli which enables us to use vue in the terminal or Command line.
npm install -g @vue/cli
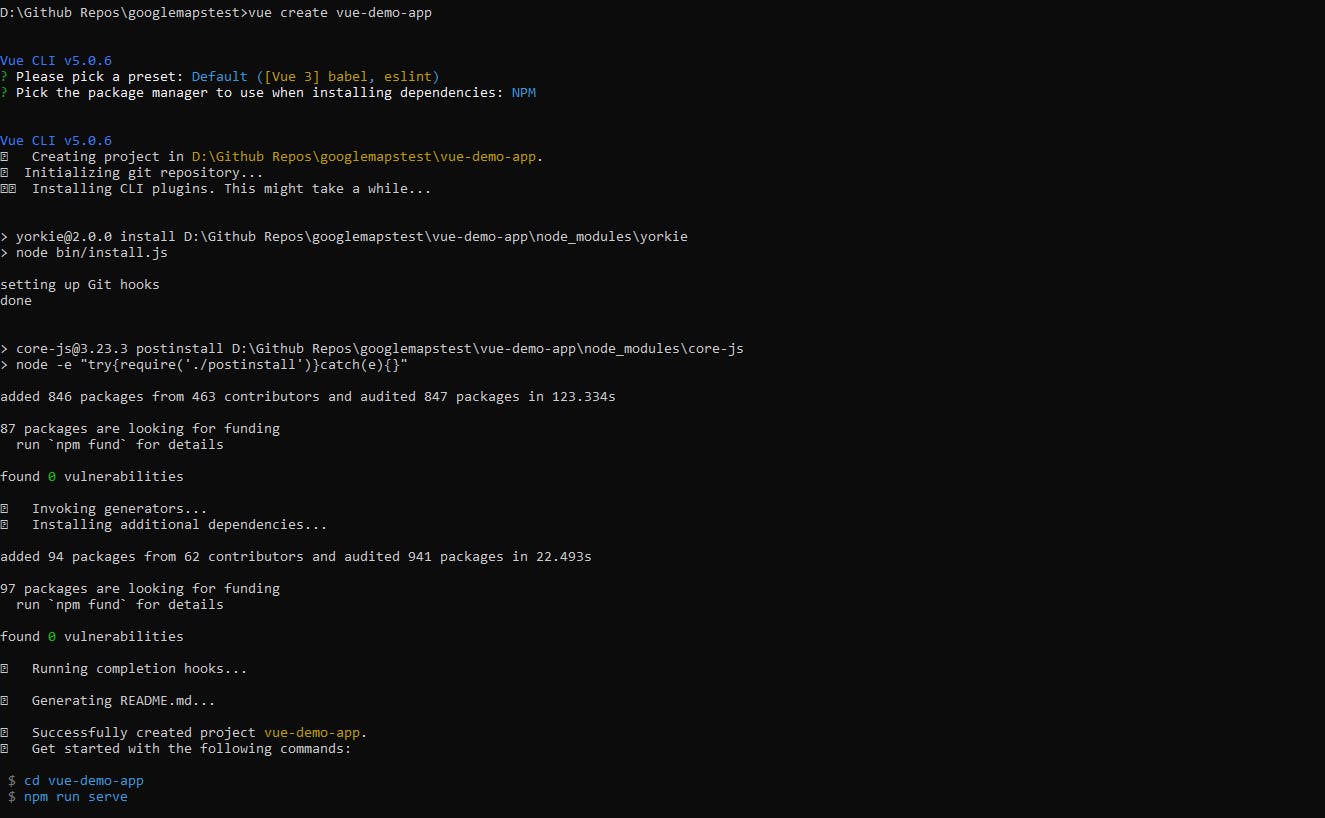
We run this command in the terminal after the npm package is installed. This command creates an already built template/boilerplate that we can work with, and we are calling it demo app. When i tried to execute this command within my code editor i got an error and decided to use CMD(command prompt) instead of using the inbuilt terminal.
npm install vue create vue-demo-app
This image is a screenshot of the command prompt output; It has a simple questionnaire to tailor the app to your personal tastes. After the successful creation of the project it suggests the next two commands we are going to use.
Install the google maps library
After the app is created, we want to change directories(move into the root folder of the app) by running the command below.
cd vue-demo-app
After we've confirmed that we are in the root folder of the app we run the next command to install the google maps npm package; the previous version of this package was vue2-google-maps, however the current version is vue3-google-maps and it's what we are installing.
npm install vue3-google-maps
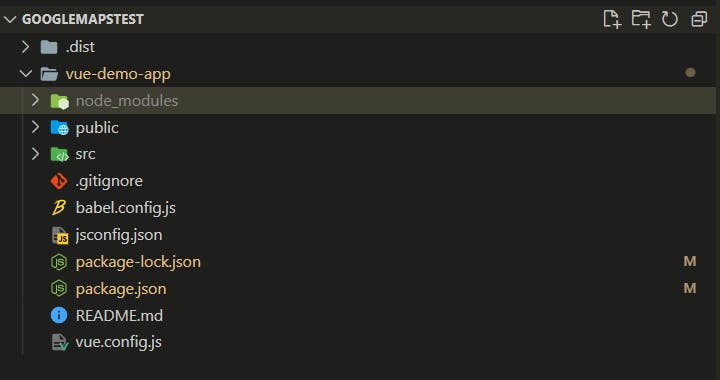
After successfully installing the google maps library, our project folder will look something like this. The library we've just installed is in the node modules folder.
The public folder is what holds the html page that we inject our vue.js code into.
The src folder holds our vue.js code and it is the folder we shall be predominantly working in throughout this tutorial.
Create an API Key from Google Cloud
To be able to use the google maps API in your Vue app, you have to create and use a Google Maps API key; Google lays out this procedure for a beginner quite simply.
Set up your project on Google Cloud Console
Enable APIS or SDKs that you need(are going to use in the project)
Get an API key
For a comprehensive guide on how to set up your project in google cloud console, find the google tutorial here
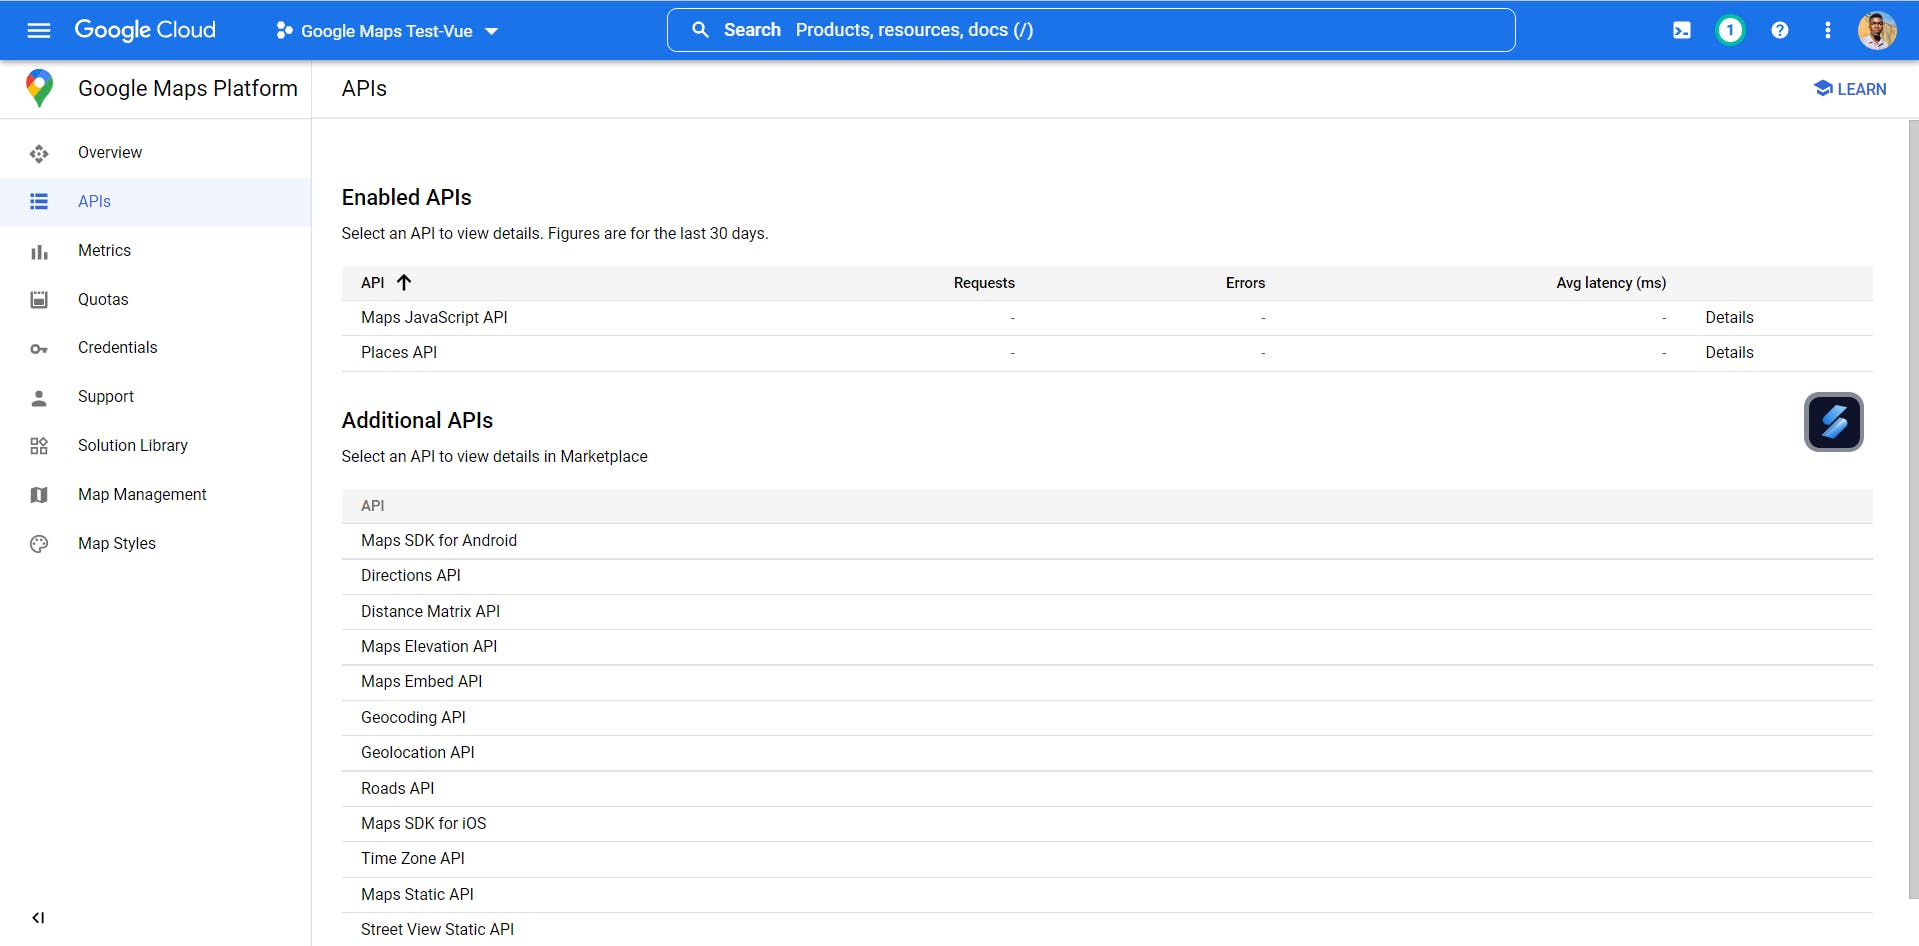
Once you have successfully setup your project in google cloud console and created a billing account for the Google Maps Platform, you must enable the APIs or SDKs you plan to use with your project.
For some app integrations you might require to enable multiple APIs/SDKs. If you are not sure which APIs or SDKs to enable, use the API Picker, for this project we are going to use a few APIs:
Maps JavaScript API
Places API
When you have enabled these two APIs, your google maps platform will look something like this
The next step is to create an API key; In your Google Maps Platform Dashboard, click on APIs & Services; a popup menu with different options which include Credentials at the left vertical menu will appear.
Thereafter, click on Create Credentials then on the API key. Create an API key by clicking on the first item in the pop-up menu.
Copy the API key from the modal dialog box that pops-up on your screen. After the API key is created, it is unrestricted and therefore can call any API and this is a risk to you or your organization; therefore the API key has to be restricted to the specific APIs we are using in this project. We also need to restrict it to certain applications such that only verified applications can call it and use it. We restricted our API key as shown below
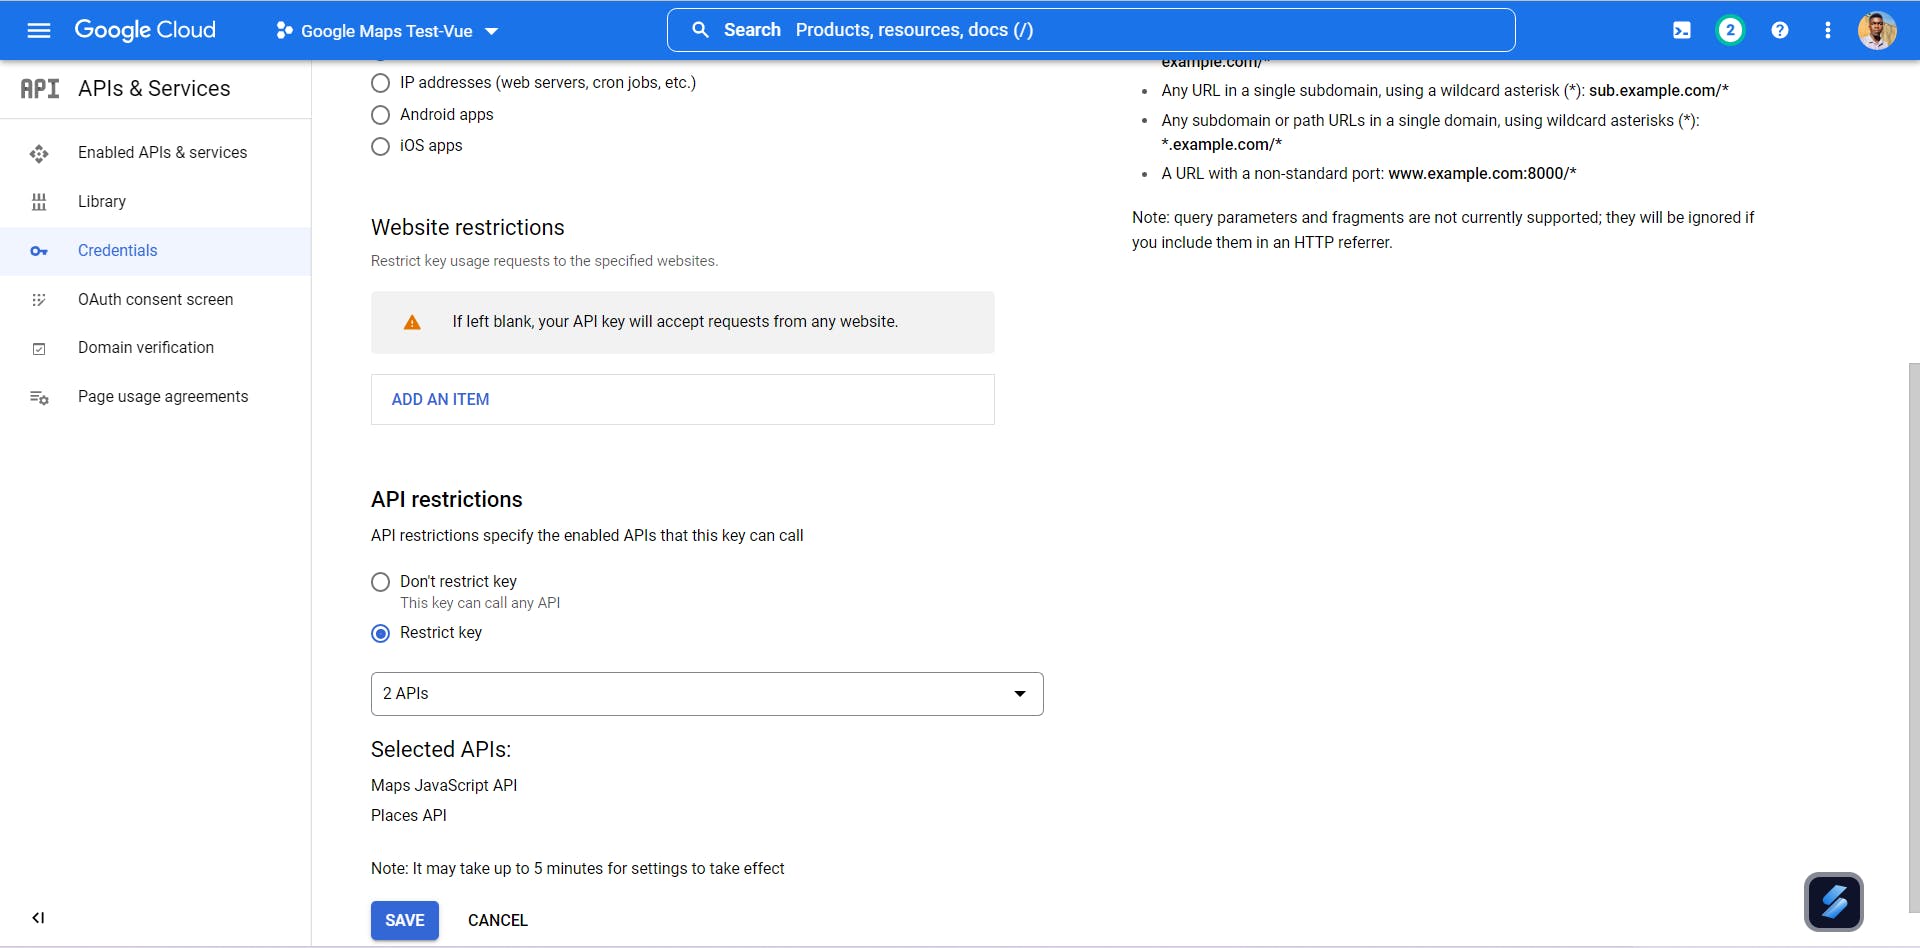
Once you're done restricting your API key; save the settings and proceed.
Import Vue 3 Google Maps Module
Since we have created our API key and have succesfully enabled the APIs we want; now we need to import the “vue3-google-maps” module and inject it into the use() method. This allows us to access the package’s methods and properties in the Vue template.
Place this code in src/main.js file.
import { createApp } from 'vue'
import App from './App.vue'
// This line imports the map package
import * as VueGoogleMaps from "vue3-google-maps"
Vue.config.productionTip = false
Vue.use(VueGoogleMaps, {
  load: {
    key: "GOOGLE MAP API KEY GOES HERE",
    libraries: "places"
  }
});
createApp(App).mount('#app')
Create a Vue component
Components are reusable instances; each component has a unique name, which can be invoked or called by adding it into the main App.vue file.
So I created my component in the src folder called components and named my file GoogleMaps.vue
You can create your file and name it anything; after which you can insert this code into that file.
The gmap-autocomplete directive autocompletes and displays the locations a user is searching for; which lets you search the location and add a location to a place. Whereas, gmap-map directive display the map fully and openly.
<template>
  <div>
    <div>
      <h2>Vue Js Search and Add Marker</h2>
      <label>
        <gmap-autocomplete @place_changed="initMarker"></gmap-autocomplete>
        <button @click="addLocationMarker">Add</button>
      </label>
      <br/>

    </div>
    <br>
    <gmap-map
        :zoom="14"
        :center="center"
        style="width:100%;  height: 600px;"
      >
      <gmap-marker
        :key="index"
        v-for="(m, index) in locationMarkers"
        :position="m.position"
        @click="center=m.position"
      ></gmap-marker>
    </gmap-map>
  </div>
</template>

<script>
export default {
  name: "AddGoogleMap",
  data() {
    return {
      center: {
        lat: 39.7837304,
        lng: -100.4458825
      },
      locationMarkers: [],
      locPlaces: [],
      existingPlace: null
    };
  },

  mounted() {
    this.locateGeoLocation();
  },

  methods: {
    initMarker(loc) {
      this.existingPlace = loc;
    },
    addLocationMarker() {
      if (this.existingPlace) {
        const marker = {
          lat: this.existingPlace.geometry.location.lat(),
          lng: this.existingPlace.geometry.location.lng()
        };
        this.locationMarkers.push({ position: marker });
        this.locPlaces.push(this.existingPlace);
        this.center = marker;
        this.existingPlace = null;
      }
    },
    locateGeoLocation: function() {
      navigator.geolocation.getCurrentPosition(res => {
        this.center = {
          lat: res.coords.latitude,
          lng: res.coords.longitude
        };
      });
    }
  }
};
</script>
Display the Google Map
To register the component in vue, import the component, define the component in the export object at the same time in the template tag.
Write this code in src/App.vue file.
<template>
   <div id="app">
      <AddGoogleMap />
   </div>
</template>

<script>
import AddGoogleMap from "./components/AddGoogleMap";

export default {
  name: 'App',
  components: {
    AddGoogleMap
  }
}
</script>

<style>
#app {
  font-family: Avenir, Helvetica, Arial, sans-serif;
  -webkit-font-smoothing: antialiased;
  -moz-osx-font-smoothing: grayscale;
  text-align: center;
  color: #000000;
  margin-top: 50px;
}
</style>
Run the Vue Application
We have configured bits and pieces and precisely went through the essential nitty-gritty; now, you should execute the given command and run the Vue development server.
npm run serve
Here is the URL that lets you view the app. localhost:8080
Conclusion
Through this Vue Google Map integration tutorial, you must have understood how to add Google Maps in Vue and how to create a Google map component within the Vue infrastructure.
As you can easily see the unbound supremacy of the vue3-google-map plugin, it offers you amply clean map integration in Vue.
Sharing my understanding of concepts and approaches to problem-solving gives me happiness and it also helps me further my career. If you have any questions, feel free to reach out!
Connect with me on Twitter, LinkedIn, and GitHub!
Also, reach out to me, if you love to discuss startup building and building open-source software directly through my email📧 .